Hey All! How the heck are ya? Boy, it feels like forever since I posted. Everything kinda got screwed up, but now I'm back on track. Hope everyone is well and having a great week!
First things first. I want to announce the winner of my note card set in the last post. Drum roll please. . . . . . . the winner as determined by Random.Org is . . . . . . . . .DPKENNEDY! Yea for DP! Can you get me your address so I can get the set right out to you? Congrats! Thanks everyone too for all of your wonderful comments on my last post! They really do mean a lot to me.
OK, now on to the current post. Over the last couple of months, I have had many emails asking me if I could do a tutorial on how I color my House Mouse images. One email stated "I would love for you to PROVE that they are as easy to color as you say they are!" LOL OK, I love a good challenge, so I put together a tutorial below showing exactly how I colored an image for my card and then the finished card. I don't know how good this tutorial is going to be, but it does show me using my "cheap colored pencils" that I always talk about. So, on with the tutorial:
Here is a picture of my famous cheap colored pencils! LOL This group is a mixture of 4 different brands (Cran, Crayola, Sargent, and Rose Art) that I use the most:

First, I stamped the image onto 110# card stock using Archival Jet Black ink. The image is a Gruffies (House Mouse line) stamp called "Beary Fast Sled".

The first thing I do is start outlining the image of the bear in the color he is going to be like this:

Once I have the image outlined, I lightly color the image with the same color like this:

Here is what it looks like before I start with the odorless mineral spirits. I think you would agree that a third grader could do a better job!:

Now comes the OMS and blending stump. I dip the stump into the oms to saturate it. Then, moving in small circular motions from the edge of the image to the center, I start blending the color evenly like this:


You can see how the color is now filling in nicely. Here is what it looks like after the first pass with oms:

Looks much better huh? Now, I go back over the image with the same color darkening the areas where I think there should be shadowing like this:

I then blend again making sure there aren't any "hard" lines and that all looks smooth. Here it is now that it is done:

Looks a lot different from the outlining stage doesn't it? I left the stump in the picture because you can see on the tip that it has color on it. I use what is left on the stump to color the face of the bear so that it is a lighter color of the same brown in the body so it looks like this:

So at this point, I have only used ONE pencil to color the bear. Next I move on to the sled and hat. Again, I do the outlining of the image with the color:

You'll see in the pic below an emery board. I use an emery board to file off the last color before proceeding to the next blend:

Again, I do the blending of the color. However, you might have noticed that I did not lightly color the center of the image like I did with the bear. The reason is that with smaller areas, you will have plenty of color to pull into the center from the outline:

Here is what the sled and hat looks like now:

Next, I wanted the handles to have a metallic look so I used a silver glitter pen to color it in:

We are now at using only 2 colored pencils and one pen. I wanted the snow to be 3-D so I used my liquid appliqué for this effect:

Once I have it applied I use my heat gun to make it puff up. Now I know to PROPERLY use liquid appliqué, you put it on and let it dry overnight, then you use your heat tool. However, I wanted the puffy look because I thought it would look appropriate with a sled pushing mounds of wet snow and clumping it to the side as it passes. So I heated it up:

Here's where we are now:

I wanted the "snow" to have a glitter to it, so I used Diamond Glaze along the edges and then added glitter:

I then realized that I hadn't made his cheek rosy like I usually do to these sweet images, so I use a light pink pencil to color right over the top of the brown, then blend it lightly with the oms:

So now I have used a total of 3 colored pencils and a pen to complete the coloring. Here is the finished colored image:
Now to the card I made using this image. Here it is:

If you click on the picture, you'll see that I stamped the hat a second time, colored it, cut it out, and attached it with a foam square for another 3-D effect. Looks like his hat is flying right off the card! I'm disappointed with the picture of the snowflakes. They were punched out of a super glittery piece of card stock so they are really shimmery in real life. The "snow" is really sparkly too.
So, there you have it. You see, there really is nothing to it! These images are so easy to color and you don't need much of anything to do it. I used 3 colored pencils for this image and got all the shading I needed. I hope now you see that it is really pretty easy to do. If I left anything out or you have questions, please send me an email and I'll be glad to tell you whatever you need to know. I hope this was helpful!
Now, I'd like to share a RAK card I got from my very sweet blogging buddy Sharon over at Grandma's House of Cards. She is so talented as you are about to see. Take a look at this card:

I LOVE THIS SO MUCH! The quality of the materials, her coloring, the image itself, everything! For a real treat, go take a look at her work. She is simply amazing! Thanks so much Sharon! It came at a perfect time!
OK, that's it! Thanks so much for visiting! You know how much I love you guys! There are days I don't know what I would do without you.
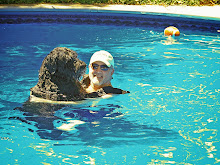
My first House Mouse Monday Challenge post will be THIS MONDAY! I'm so excited and nervous. Can't wait to show it to you. So, until then, you all take good care! Don't forget the "Pic of the Week" below!
Best,
Curt
"God, please help me be the person that my dogs think I am."


54 comments:
Super tutorial Curt - great job showing all of us how it's supposed to be done! I love your colored images and it was really nice to see exactly how you do it! Thanks! Love the shadows picture of you and the boys too! ~chris
Welcome back, missed you. Thanks so much for the art lesson, good job. Looking forward to your first HM design.
Wowzers, Curt, I think you need some Twilight Zone music playing in the backround on your photo of the week! Great shot! My DD has 'an eye' for photography too - she takes wonderful photo's, as do you! Your card is absolutely adorable. You know, I finally broke down TODAY and bought some Prismacolor pencils, and I don't like them as well as I do my cheapies!!! Great job - can't wait to see what you post on Monday!!! Is it Monday yet?
Awesome tutorial, Curt! It was really great to see your fabulous coloring come to life as you worked with it! You really know how to handle those pencils and your card is ADORABLE!! Can't wait until Monday to see your first HM DT post! WOOHOO!!!! I'm so happy you liked your card and that it made you smile. And that's a really cool pic of the week too! Have a fabulous weekend my friend!! big hugs!
Hi Curt, bloody brill tutorial, i luv colouring them in they is so easy. luv the card great snow effect. Can't wait to see your house mouse card for monday, as always it will be fantastic, hugs, sue.x
Great tutorial Curt...wonderful pictures! Can't wait until Monday! ...and Sharon's card made me just chuckle!
Awesome card, Curt.
I just love your HM cards. Your tutorial is fabulous, I don't think anyone can colour them as amazing as you do!! I can't wait to see your debut on Monday.
Love your pic of the week too!
Karen x
Fab tutorial Curt :-) I have just bought a couple of those paper stumps ,,, will have to have a go later :-)
Gorgeous card and love the pic of the week too ! lovely :-)
I am looking forward to seeing what you made for next week ! :-) Am sure it will be brill :-)
Luv
Lols
I think I use my prismacolors with gamsol more than my Copics. Or I will do the faces of stamps with the pens and then switch to the pencils for the rest. I love to color!
Super tutorial, you are soo clever, you belitttle your technique to much babe
Lovely to see you
Have a good week
xx
Thanks so much for the tutorial, Curt! I love to see all of the different ways to color images from all of the talented crafters out there! The snow and the 3-D effect of the hat and the metal handles and great little details that add so much to the finished card, which is gorgeous! Thanks again for sharing!
Hey ya! Thanks for sharing! I am waiting for Prisma colors pnecils from US, they will be a nice addition to my Copics! So this was a perfect timing! AND of course your card is stunning as usual, Curt! Hugs Nilla
What a great tutorial Curt - need to get me some of that OMS I've been using Baby Oil - works but I think the OMS might be better. Can't wait to see your Monday post - have a great rest of the week!!
Great tutorial, I am going to send your blog to my sister...I just had her get cheap pencils and OMS after telling her about your awesome cards....I bought my bottle of OMS last year from Gina K Designs....and my husband works for a paint manufacturing company and thought I was "nuts" as he put it, as he said he could bring me a truckload of OMS...heehee...bring it on....but I only needed a small amount...not a truckload....loved seeing what you are doing and how...wonderful card...thanks for sharing!!
Thanks for the great tutorial
Curt, love this card!! And what a great tutorial!! I haven't colored with my coloring pencils in forever really need to get my House of Mouse images out and start playing again. Love that you cut out another hat and made it look 3D.
Hugs,
Angela
Curt thanks for the great tutorial. I'm finally getting where I don't color in so deeply. It gives a better effect when there is a little more blending. I love that image too-one more for my ever growing wishlist. I finally got to using some of those long cards that were in the blog candy. Hopefully later today I will post a blog. Trying to get the High schooler up and movin. UGH! Have a wonderful rest of the week!
Awesome tutorial Curt! You really do make colouring HM images look so super easy! I love the finished card too! Great job. Can't wait to see your first HM DT card - I'm sure it'll be a huge hit!
Your pic is amazing - such creativity in your photography!
Hugs, Danielle
Such a cute card! Thanks so much for sharing your coloring techniques! :)
Great tute and awesome card. Glad you're back in the fold. Pat
Fantastic cards, Curt! Thank you so much for your fabulous tutorial! I really enjoyed it and I learned a lot! Looking forward to your next House Mouse!
Hugs,
Lisa
P.S. I like your profile pic..it's nice to put your face with your name:)
Wow! That is amazing, Curt! Thanks so much for sharing this tutorial with us!
Looking forward to seeing your HM challenges :)
Now don't mind me, in the meantime, I've got a sparkley vampire to distact me ;)
:*) margie
Wonderful 'tut'!!!
It sure put things in perspective for me.
Thank you, thank you......you're a great instructor Curtis.
Thanks so much for your wonderful tutorial! It's amazing that you created such a beautiful card using three pencils! Love that snow too.
Best wishes for your first HM DT posting. Don't be nervous--I know it will be fabulous.
HOW CLEVER YOU ARE...LOVE THAT BEAR...AND HOW YOU MADE HIM COME ALIVE...I WANT TO GO SLIDE WITH HIM....LOVE YOUR "SHADOWS". LOVE YA, MOM
OMG Curt, what an AWESOME TUTORIAL! You have truly motivated me to take the plunge and try it since I have all the materials, and now you've given me the motivation!
Thank you, thank you very much my friend.
Hugs,
Gina
Awesome job! I learned something new today. Thanks
Thank you for the tutorial! I actually learned alot and will try to remember it next time I color something. Your card is beautiful and I love the sparkly snow, too. No such thing as too much glitter :-)
Great tutorial Curt! Great coloring with 3 pencils. Love the snow effect! Love your shadow picture too!
How kind of you to show us such a complete tutorial. Thank you for all the details.
I love your tutorial. I learned another way to color with my pencils. Your cardis so neat all finished. The card your buddy sent youve the dog. Your pic is outstanding. What clear shadows.
You coloring tutorial is amazing! Thanks for your tips, will help in future projects for sure!
Hugs,
Michelle
Hiya Curt!! I just love the wonderful tutorial you did on coloring this adorable house mouse bear! You did a great step by step tutorial with awesome technique and photos! Great job and I can't wait to see your card for Monday!!
Hugs
Jodi =)
Great job on the tutorial!! You make it look so easy. Also loved the "Shadows of Us" photo - you find inspiration everywhere don't you.
Thanks for just being YOU!
Elaine Moore
Curt this was a great tutorial!!! I love how you showed the step by step colouring! Love this card.
Cathy xxx
Oh lucky me! You have my address!! But I will send it-wouldn't want my stuff to get lost, lol! Thank you so much!
Great tutorial Curt! I think your card looks fabulous! It's so hard to photo the sparkle, no matter what you do, but we know it's wonderful!
Have a great day and thanks again!
Your the man!! Almost makes me sick that I spent so much on other coloring options and I can do some seriously awesome stuff with cheapie materials. Okay now I need to try this with my Crayolas! Bet it doesn't turn out nearly as good as yours! LOL!
Thanks for the tutorial...fantastic work!
-Stacie
Great job Curt!! Glad to see that you are alive and kicking!!
Wow...you did make that look easy. I think even "I" can do that ;) hee hee hee. And the card turned out so darn cute!!!! Can't wait to see what you have to share on Monday!!
FABULOUS tutorial, my Friend! You work those pencils so beautifully. You are AWESOME and you do AWESOME work!
Next week I am going to post something about last year....on 11/14, 2008, I began that incredible journey of illness and survival. I have been giving it a lot of thought lately -- I truly can't get over that I am still here!
Hi Curt! Even though I've NEVER tried this coloring technique...you make it look so simple! GREAT tutorial! I love the finished card too! Your POTW is way COOL...I did one like that not too long ago of me and my husband! FUN stuff! Can't wait to see what you've got for us on Monday! Be good and have FUN! HUGS!
Thanks for your visit to my little corner of blog land and the kind comments you left me. I loved the tutorial you did.You're so talented and I can't wait to see what you create for House Mouse. I know its going to be great! I have a question though, where do you find odorless mineral spirits is there a brand name, I've heard it called Gamsol but Michaels didn't have that and I didn't know what to ask for. Thanks for sharing-Tania
Hi Curt
Fabulous tutorial - it was spot on - so easy to follow and you know I think you're The Best with rendering!
That image is totally adorable and I love the finished card. I can imagine how pretty the snowflakes are, glitter is almost impossible to capture.(Shame cause I love it so much).
Isn't Sharon's card fab!
Hope you have a wonderful weekend and looking forward to your Monday Challenge.
Elaine x
PS Just goes to show you don't need expensive pencils to create a work of art!
Wow,wow...nice tut . Thank you so much :D
----------------------------------
Welcome to my website : http://9wallpapers.blogspot.com/ . This
is a website where have a lot of beautiful wallpapers .Especially ,
all free !!!!
Oh My Goodness, Curt! Thank you so much for the tutorial - this is wonderful, and you're right, it's much easier than I thought it would be! Your card is adorable - I love how you make the snow both puffy and sparkly. Glad you're posting again - I missed you!
Wow, you have alot of followers! Thanks for the tutorial. I like how you did it. I have dial-up and can't always get the "filmed" tutorials. Your card is great! I especially love your shadow phot of you and your "babies."
Beautiful OMS tutorial! loved the progression of your image coloring, so neat :)
Fabulous tutorial Curt!!! I'm wick at colouring but now that i see how it's done I might give it a burl as we say over here! lol!!!
Just fabulous. I am so thankful for the tutorial. I have a friend who suggested looking at your work with oms and I am so glad I did. I cannot wait to get started doing my own. Thank you again!
How did I miss this?...Gorgeous card and a Fabulous Tutorial!!...Hugs, Ila
Good work. Keep it up. Keep posting. Thanks for sharing.
Regards,
image masking services
curt, wonderful tut! never used any of that with my colored pencils! but I should give it a try! have the stuff, but I never reach for it! and what exactly is that puffy stuff? I soo love the look of it for the snow... going back to re-read!! lovely
Curt, your tutortial is just woanderful and your card is a work of art. Love it and that wonderful adorable doggie below!!
Alrighty! Finally checked out the coloring!
Awesome I say!
I only have 2 questions:
Where do you get odorless mineral spirits?
AND...What the heck is a blending stump? And where do you get them?
OK, 3 questions!
Post a Comment