Curt's Best Shots Slideshow

Thursday, December 18, 2008

Seeing Spots!

Hey All! OMG it is a week until Christmas!!!! AHHHHHHHHHH Can you believe it?!?! I did make a dent in my projects, but I have several more to complete! Hopefully I'll have everything done by Sunday. I hope you all are caught up and are where you need to be. If not, I hope it brings you comfort that I'm right there with you! Here's what I've been working on in the last few days. . .
The first project was the gift to my Vet's office and their staff. When I called and asked how many people were there she said "14". I thought your sh***ng me, right? I thought there were only 6 or 7 LOL! So it was double what I thought I had to make! Oh well, 'tis the season huh? I made 14 of my candy sleeves with the "faux" belly band. I made 3 designs and here they are:


Pine branch, snowflake, and holly. The paper is from the Paper Studio, card stock is by Bazzill, and all of the punched images are Martha Stewart punches. I cut the scalloped circles and regular circles with my Nesties, then attached them to the band with dimensional tape. Here is a close up


After making all 14, I put them in a basket and the finished gift looked like this:


I hand tied the big red velvet bow and attached it to the front of the basket, and stuffed the basket with a combination of tissue paper and sparkly red netting. I then arranged all 14 bars in the basket and tah dah! They were very impressed, and loved the gift. I got a thank you note today from the staff. I had also made a card to go with the basket (of course). I wanted it to be "dog themed", but after making 14 of those sleeves, I decided to do a simple card. Here it is. . .


I LOVE this stamp. As some of you may remember, I used it for the first time for one of my Autumn cards. I thought this is so perfect for a winter card. This stamp is from Penny Black, and it has to be one of my favorites. All the card stock is Bazzill, and I stamped the image in Versamark ink then embossed it with white ep with glitter mixed in. Look at the close up below:
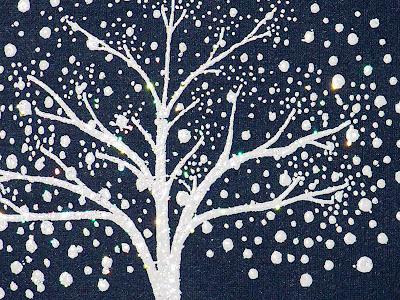


Such a pretty effect with the sparkles! Anyway, mounted it on an the Swiss dots embossed card stock with foam squares for depth, then mounted all of that on watercolor card stock. The sentiment is from a $1 stamp, and the snowflakes are from a Martha Stewart punch. Added some bling to the snowflakes and done! Easy as could be.

The last think I have to show you are the "mass produced" cards I did. These are also the reason for the title of this post LOL. I wanted something that I could piece together after cutting all the pieces out for all the cards at once and then begin an assembly line. However, I wanted it to be a little elegant at the same time. So, here is what I came up with:


The stamp is by Hero Arts. I stamped the image on silver card stock using Versamark ink. Then I embossed it with an embossing powder called "gold tinsel". Boy is it sparkly! I love gold and silver together. Here is a close up of the detail of the ep:


I mounted it onto metallic gold card stock from DCWV the metallic stack. The silver section is raised with dimensional foam squares. I then mounted that onto another piece of silver metallic card stock. I stuck every one of those little red sparkly dots on one at a time. Now you understand why I called this post "seeing spots". OMG! They are really small, and I had to lift them off with the tip of my piercing tool, transfer them to the card, and then press them on. I made 20 of these and I'm tellin' ya I WAS SEEING SPOTS when I was done. These are A2 sized cards which I normally don't do. I'm not good at the smaller size, however this design lends itself to a smaller card. The sentiment is on the inside. Below are a few larger square cards that I made to send out too with the same tree stamp:


Again, these 3 designs were done pretty much the same, however they were mounted on card stock that was already pre-embossed. I thought this pattern was really nice.

So, there you have it. That's it for this show and tell. I did manage to get all of my cards mailed out to all of you that I have an address for. Hope you like them. Speaking of, I have been receiving cards from many of you, and I so appreciate them. What I thought I would do is save them and post them all at once as my Christmas Eve post.

One final note. I was very saddened to learn of the death of Joanne Johnson of My Adventures in Card Making. I just went back over to her blog to get the address to link, and noticed that she has 171 comments for the post her husband posted shortly after her death. Amazing. Joanne was one of the most sweet people I have ever met. She had one of the best outlooks on life and was so positive. If you want to read something that will give you such inspiration, read her Friday, November 28Th post. It is a prime example of why I loved going to her blog. Please go hug the ones you love at your earliest convenience. You never know. . .

Don't forget the pic of the week below! I'll see you on your blogs! Thanks so much for coming! I truly am grateful for all of you!

Best,

Curt

"God help me be the person my dogs think I am."


Saturday, December 13, 2008

Christmas Cards/Great Cartoon/Stuff


Hey All! Before I start my ramble, I just want to say thanks to each and every one of you who left such uplifting comments on my last post. If you were all right here right now, I'd give you all a giant hug! You don't know what your comments mean to me. For those of you who don't have a blog, or have your comments set to "no reply", I want you to know I do appreciate the comments, and I wish you would give me some way of responding to you so that I can say thanks. But until then, know that I love your comments and I think you are wonderful for leaving them.

OK, that mushy stuff said, take a look at this hilarious cartoon I found in the January 2009 issue of the Reader's Digest (be sure to click on the picture for all of the detail, it is priceless!):


OMG is that hilarious or what?!!! I couldn't believe it when I saw it. Especially since it is a guy being interviewed! How perfect is this for me. As many of you know, I am currently unemployed because of downsizing. Can you see me in this situation in the future?!?!?! LOL I swear, if it doesn't break any copyright laws, I'm going to use this as the header for my blog after the holidays. What a hoot!
Alright now. . . .on to the Christmas card. This one took me some time, but I think the result was worth it if I do say so myself. I've seen others make this wreath, and I always marveled at them, and I had the punch, so this is my version. . .


This is a 5 X 7 card (which most of mine are). I used the McGill pine punch to punch out the gazillion pine branches. I punched them out in two different shades of green to give it more of a "real" look, and a few gold branches for decorative value. I cut out a "ring" to use as a template for the wreath using my Nesties. I then began to glue them on to the template one at a time with my Martha Stewart glue pen (I love that pen). I alternated greens and stuck on the gold ones last. I used red rhinestones for the "berries" and glued those on using diamond glaze. I then used my CB and embossed that background with one of the folders (forget what it is called) and used a Gelly Roll glitter pen to highlight the raised parts. I mounted the wreath on that with foam dimensionals, mounted that onto Bazzill card stock, and added the bow (ribbon from Michael's). The sentiment is from Martha Stewart and I added the two rhinestones on either side to finish it off. If you click on the photo, you will see how glittery the background is.

My next project is a set of monogrammed note cards that I made for Jay's Mom's birthday. Here the are:


I made two each of 3 designs. I wanted them to have a little elegance about them, so I used paper from (I believe DCWV) a stack called "simple elegance". I mounted all the papers directly onto Bazzill white card stock. The monograms were done using the JustRite DIY Monogram Stamper Kit. I love this product, and plan to get other sets. This is a great starter. I stamped the monograms in Versamark ink and then embossed with black fine detail ep. I then cut them out with Nestie circles and scallops. All were mounted with dimensional foam squares. I tied ribbon to some and added bling to others as you can see from the close up below:


I put them is a simple box (store bought) and decorated it with ribbon and a matching monogram tag. She really loved it. I had to take it back from her after I had given it to her because I realized I had forgotten to photograph the set for my blog. LOL

Finally, I received the sweets RAK from the very sweet Michelle Ueligitone. I was so pleasantly surprised to receive it. Here is what she sent:


It came on a very wet, cold, grayish creepy day. When I opened it, it was like opening sunshine. It really brightened my day. Michelle lives in Hawaii, so it was nice to think about such a beautiful place for that moment. If you have not visited Michelle, go do so. She is very talented, and she has the most amazingly beautiful little daughter! They actually are both stunning beauties! Thanks Michelle. It was so thoughtful of you!

That's it for this post kids! It is 10:00 pm here and I'm off to go upstairs and continue working on my Christmas projects. Here's what I'm working on to be highlighted in upcoming blog posts: Dog treat Christmas gifts for the neighborhood dogs; Dog themed clear ornaments to go with them; giant candy bar Christmas sleeves (40 of them! LOL); and various other Christmas cards. These are just a few of what I'm working on. So lots of posts coming!

As always, thanks so much for stopping by. As I said at the beginning, it means so much to me. I'll be looking at all of your blogs when I get up tomorrow while having my first cup of coffee, so I'll see you in the morning! LOL Don't forget the pic of the week below!


Best,

Curt O'Brien

"God help me be the person my dogs think I am."

Thursday, December 11, 2008

Challenge Entry

Hey All! Hope your week is progressing well! Today's post is super quick. I wanted to try the House Mouse Monday Challenge over at House Mouse Challenge. This is my very first time doing a challenge with them. You all know how much I'm loving the House Mouse stamps and I'm feeling a little more confident in my coloring abilities so I thought I would give it a shot. The challenge this week is "Let it snow". You are to use at least one House Mouse or Friends stamp on your card and this challenge you had to add snow. So here is mine:


Boy did this card take on a life of its own! Geeeez! I started out with the image stamped on white card stock and colored with colored pencils and OMS. Well, all coloring was completed accept for the tip of the second branch from the top on the right. I was using a blending stump and my dear, sweet little Gunther barked unexpectedly which caused me to jump and smear the color WAY out of the lines! LOL Little monster! My original intent was to cut the image out in a square, mount it, add a few flakes, and done. But Gunther changed all of that. So, not wanting to have to re-stamp the image and re-color it, I had to figure out a way to salvage it. So after much pondering, I came up with the idea of cutting the image out as close as possible which would eliminate the smear. Then I thought I would mount it on paper that I embossed with the CB snowflake embossing folder. OK, so far so good. Then I thought I would simply mount it on the white card add a sentiment and bow and be done. But it was way too much white so I added the green matting. It still kind of looked a little plain, so I got out my Martha Stewart glue pen and dabbed at all the embossed snowflakes in the background and sprinkled them with glitter. That looked better, but still it needed more. Got out the Stickles and dotted the tree with "berries". Looking better, but not quite there yet. Applied the liquid applique for more snow effect and pressed in glitter and heated it with the heat gun. OK, almost there. I had a hell of a time with the bow because I wanted to put it where I have it, but I needed something to tie it around. So I cut a thin strip of the green matting paper and a thin strip of card stock for stiffiness and tied the ribbon around that. The bow just didn't look right, so I added another strip of ribbon which I tied around the middle knot of the bow and cut it. Now it looks like a deformed octopus bow, but I was so done with this card by then. THEN I realized I didn't put any sentiment on it. So at the last minute I created the "Deck the Halls" sentiment on my computer using the Curlz font, cut it out, attached it with the "bend" to give it a 3-D effect (I've seen that on other cards and I like it a lot - see the up close pic below), added the bling and said "That's it, enough, I'm done!" I think that is why I don't do challenges, because I get my self in these tizzies over wanting it to be perfect.


Oh well, I don't think it turned out horribly, what do you think? You can see from this shot that I only attached the cut out image from the bottom leaving the top to stick out a little bit from the background to give it some depth.


Well there ya have it! My first House Mouse challenge. Or shall I say "mine and Gunther's first challenge". LOL


Thanks for stopping by! I'll have another post on Saturday for you. Can't wait till you see the one card I'm just about finished with. Until then, I'll see you all on your blogs!


Best,


Curt O'Brien


"God help me be the person my dogs think I am."

Sunday, December 7, 2008

Birthday and Thanks

Hey All! Sorry it has been several days between posts. Don't know why, but I've been in a funk that has lasted about a week, and I finally think I'm coming out of it. I don't know if it is pre-holiday stress, or just plain feeling blue, but I just didn't feel like going up those stairs to create. But then as surely as it came, it left, and I climbed those stairs and got to it! Now I'm working on 4 different projects which will show up in subsequent posts, so I'm showing you the cards I made yesterday.

The first one is a birthday card I made for a very good friend of mine named Jan. As I do every year, I totally spaced her birthday. I get so mad at myself for doing that, and I swear I do it to her every year! I can be such a moron some times! Anyway, she and I have been friends for many years, and she is the reason I have gotten my last two jobs. She has really been a great friend. Here is the card I made for her:


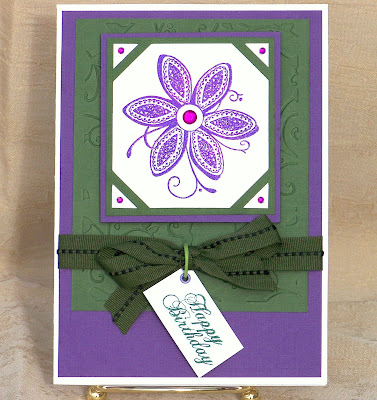
When she bought her condo several years ago, she painted her bedroom this gorgeous shade of eggplant. So, I made the card with that color in mind. I used standard Bazzill card stock, ran the green piece behind the image through my CB, used a corner punch to achieve the edges around the image, and added some bling. The flower (stamped in Versamark and then embossed in purple ep) is an Inkadinkado image (I believe), as well as the sentiment. I mounted the image to the card with dimensionals, tied the ribbon, and done. I love these two colors together. They are actually darker than they appear in the photo. Here's a close up of the flower:


As I said, she is such a good friend. I went to my mailbox the other day to get the mail, and there was a gift bag in the box. It was from Jan, and when I opened it, I couldn't believe my eyes. Here is what she got me:


Is that not amazing!?! I can't believe she found this ornament with a silhouette of a Giant Schnauzer it it! These are so hard to find, but she found it! And here I forgot her birthday again. I feel like such a schmuck! So, I wanted to make her a thank you card, so here it is:


I showed two angles so you could see the shimmer in the top one. I LOVE this stamp! It is called "Frosty" and it is by Penny Black. This snowman shows such happiness, and that is exactly how I felt when I saw my gift. So, I thought this would be a perfect image to use. I stamped it in Staz-On jet black, and colored the shadowing with colored pencil and OMS. I also used that around the frame of the image as well. I'm not to good at distressing the edges with ink pads. I always get it all over me and not evenly around the edges. So, I use a colored pencil and scribble the color all around the edge, then use OMS to soften it. I think it works well, at least for me! LOL I then added sparkle around the frame, in the snow, and on his shadowing with my Gelly Roll sparkle pen. Then sentiment is a $1 stamp I got at Michael's. I punched out the tiny snowflakes with a punch and added bling to each. The image was matted on navy blue Bazzill cs and then attached to the card with dimensionals. Added the ribbon and attached the sentiment with a silver eyelet and some silver cord which finished it.


So, there you have it. Now I have a couple of pics to share with you of my Gunther. The first one shows what he does when I'm talking on the phone:


He lays his head right on the phone and stares at me like "Daddy! Get off the phone and play with me! I'm bored!) He has actually laid his head on the phone when I am not on it, and hits the speaker and redail button which called my Mom! He is such a brat!


The next two pics is of him wearing my hat. He actually laid down and went to sleep with it on, so I took this first pic.


Then he heard me take that picture and kinda sat up and I took the second picture:


He looks like he is saying "What's the big deal? Don't all dogs wear hats?" LOL He is such a little clown. My Shotsy is nursing his back leg. He has had surgery on both back legs to replace his ACLs. He had the surgeries last year and the year before to the tune of $6,000.00! But he is worth every cent! But ever since the surgeries, when he overdoes it with running in the park, sometimes he has to nurse his right back leg. It always worries me.


OK, enough of my babbling! I'll have another post is a couple of days. Working on some Christmas cards and projects that I want to share with you all!

Don't forget the pic of the week below! This was a pic of a hawk feather that was caught on a very tall piece of grass in the field next to the path. It just seemed so odd flapping in the breeze, but it looked so beautiful with the way the sun was hitting it. It makes a bizarre picture, but cool too I think.


Thanks so much for visiting! I feel better now that I shared this stuff with you! I'll be seeing you on your blogs!


Best,

Curt O'Brien

"God help me be the person my dogs think I am."

Monday, December 1, 2008

HEAL!

Hey All! Today's post is a get well card that is a little different. My Mom's good friend had a very nasty fall a few weeks ago, and ended up breaking her arm. Ouch! I know this woman somewhat, and wanted to cheer her up. Because of this accident, she can't work and is really having a tough time. Because there was injury, the first word that came to mind was "heal". When I hear that word I automatically think of the dog command "heel". So you put the two together in my head, and you come up with this card. . .


I LOVE this dog image. This image is from a set I used to create a card back in August. This is an "altered" image. This is not what the original dog stamp looks like in the least. I cut off the ears and the tail, altered them and then used them as "new and improved" ear and tail. Lots of plastic surgery to make it look like a caricature of my beautiful Shotsy. I had to hand color the image after stamping it because the original has little white spots and circles all over his body. Anyway, I hand made the little collar and the big collar. See pics below:


I used a sparkly glitter pen to put the studs on his collar, and then did the buckle and dog tag out of metallic card stock. I did faux stitching on the big one too. I used a silver cord from a store bought gift tag from Christmas last year to attach the dog tag to the buckle. Supply list is below.
Hope you like it!


A couple of other things. . .I was again bestowed with two more awards from two very sweet people. The first from my very good blogging friend Pat at the Rubbermaid. Such a sweet award. If you have not checked her blog out, you need to do so. Not just for her very wonderful creations, but also for her hilarious sense of humor! She is a riot! I'm proud to call her my friend. She is also the mother of the super talented Julie Koerber at Out to Impress. Here is the award she gave me:


The other award was given to me by Jodi at Inked Inspirations. She was just recently married and she is just adorable! Her cards are marvelous with such wonderful detail, and she is so good natured with my bad sense of humor. She had showcased a card on her blog where she used one of the Matilda stamps (I think that's what they are called). Anyway, they are the ones that kind of creep me out because they don't have mouths. She was making up a story about how she thought the male was in the house (in the background) making her dinner. In my comment I said that I didn't think that was the case because why would he make dinner if they didn't have mouths to eat it with? LOL Oh I am so horrible!!!! I still laugh when I think of that though! She was sweet and just replied that I was so funny! Gotta love her! Here is the award she gave me:


OK, here is the same caveat that I put whenever I receive one of these. First and foremost it is always appreciated! I'm always honored when you think enough of me to give these to me. I am so humbled. However, I usually don't follow the rules because I think everyone who I visit on a regular basis deserves the awards, and they only limit you to give to a few. So I always share this with everyone because you are all so deserving. And besides, most of you who I visit already have them! LOL


Lastly on a serious note. . .I got an update on my blogging friend Glee. A lot of you know Glee from being visitors on her blog. Her husband has left another update as of last night. Though there is some inkling of good news, Glee is still on the respirator and has now had to have a feeding tube put in. She is still sedated. Please think of Glee, and continue to keep her in your thoughts and prayers. Let it also make us aware of how quickly our lives can change and forever be altered by something like this. It would be nice if you would all go over and leave some encouraging comments not only for Glee, but for her husband who is by her side through this. I know many of you did the last time I gave an update, and her husband seemed very appreciative of it and can't wait to give all of them to Glee.


OK, that's it. I'm working today on some winter/Christmas cards for upcoming posts, so check back in a couple of days for new stuff! Don't forget the pic of the week. I took this over the weekend. He/She is so beautiful all huddled up like that. It was cold and blustery, and she was all puffed up keeping warm.


Take care all! I love that you stopped by. . .it means so much to me! I'll see you on your blogs!


Best,


Curt O'Brien

"God help me be the person my dogs think I am."


Card Materials List

Card Stock: Archiver's, DCWV
DP: Rhonna Farrer
Ink: Archival Jet Black
Sentiment: Curt's hand LOL
Odds and Ends: Gelly Roll sparkle pen, silver cord, Nesties, black marker.
Stamps: Inkadinkado

Thursday, November 27, 2008

HAPPY THANKSGIVING!

Hey All! Happy Thanksgiving to each and every one of you! It is just a little after midnight here so "officially" it is Thanksgiving! I wanted to post the card that I'm giving to my Mom, Jay's Mom, and Jay for today. I'm also posting some pics of a project I made on my own to use as favors to lay at each place setting for dinner. And then at the end of the blog I'll list some things that I am thankful for. Here is the card:


I have always been afraid to mix patterned paper. So many of you do it so well, but I just don't feel comfortable with it. However, I went outside my comfort zone and chose these two patters to put together. I think they look pretty good together, but some of you may be snickering or going ewwwwwwww. Oh well, I tried. But I do like how it all came together. I'll list all supplies at the end of the blog. One thing I do want to mention, I used a new set of shimmery paints that I ordered from Impress Rubber Stamps. The paint set is by Yasutomo. I used the orange shimmery paint on the pumpkin image and you can see it better in the picture below:


As you hold the card and move it from side to side is gives this cool reflective shimmery look. The paint is very transparent and came in 24 colors I think in the set. It was really reasonable too. You just touch your brush with water and then into the hard paint pot and brush it on over the image. It is very translucent. Very cool stuff.

Now here is the project I did to go with the cards at the table settings. I bought each of them one of those large candy bars. I have seen on lots of blogs where people make sleeves for the candy bar. Well, I was already upstairs and didn't want to come back down stairs to log on and try to look through several blogs for the measurements. So, I thought "how hard can it be to wrap paper around the candy, get the measurements, and make them myself. So that's what I did. Here is the finished product (but read on after because I came up with what I think is kind of a nifty thing).


See the band up there? It really isn't a full belly band. It worked out perfect because the whole sleeve and band can be made from one 8 1/2 X 11 piece of card stock with one cut! Super easy. The sleeve is pretty much self explanatory. But on the band, you score it so that it wraps around long ways and slides behind the candy bar in the sleeve. Look below:


How fun is that? Once that is tucked on each end, the candy bar stays firmly in place and does not slide out even when you hold it up and shake it! Pretty cool huh? I didn't want to have to cut a second strip and tape them together to do the traditional belly band, so this was my solution born out of being lazy! Hope you can use it. I plan on doing these for Christmas stocking stuffers. I envision them with cool winter paper and a sparkly snowflake on the circle. Once I had my measurements down, it literally took me 20 minutes to do all 3 of them!

OK, now to a few things I'm grateful for. My list could go on and on, but I will make a short list of the important stuff.

1. I'm grateful to be alive and to enjoy the things that I do.

2. I'm grateful for a Mom who is supportive and always there when you need her.

3. I'm grateful for my 22 year relationship. Jay has provided the grounding for me, and even though there are a lot of difficulties we fight with his MS, we are still together and going strong.

4. I'm grateful for my beautiful Giants. They supply the joy in my life and the perspective I need on life. They keep teaching me what unconditional love really is, and I love them so much for that.

5. I'm grateful to be living in a free country. Every day that goes by as I read about the horror and terror that goes on in other countries, I thank God that I live in the United States.

6. I'm so grateful to those men and women who make the above possible for me every day. I can't image their and their familie's sacrifice, but I'm thankful for it every day.

7. I'll end this list with something else that I am grateful for, and that is all of you! Every day when I log on to my email and see the wonderful, supportive, and uplifting comments you leave for me on every post, it just makes my life so much richer. I've met so many wonderful, generous people through this crafting/blogging thing, and I am so much better for it and because of you. So on this day of giving thanks, I give thanks for all of you!

Happy Thanksgiving to you and your loved ones. Make sure you count your blessings today! You are counted among mine.

Best,

Curt O'Brien

"God help me be the person my dogs think I am."

Tuesday, November 25, 2008

DON'T LEAF WITHOUT ME!!!

Hey All! Told you I was going to post more frequently! I don't know what has gotten into me, but I swear I've just been itching to get up to "my room" and create. Also, if you are interested, I was tagged and I have finally played along. If you want to know 7 things about me, read to the end of the post!

Today's card is another House Mouse card. Don't worry, they all aren't going to be HM cards. I'm particularly proud of this one, because I ordered this stamp a couple of months ago, and it became a milestone marker for me. When I ordered it, I knew that there was no way I could color this stamp at the time I bought it. But, I bought it anyway telling myself that as soon as I felt comfortable with my coloring, I would know it when I would tackle this stamp. Well, needless to say I "tackled" this stamp! I loved this image from the moment I saw it. Here it is:


This is the "Don't Leaf Without Me" stamp. This is a huge stamp. The card I mounted it on is a 5 X 7, so you can guage how big it is. There was a TON of coloring for this one, but it was so much fun, and I love how it turned out. I used my colored pencils, blending the colors with OMS. I mounted the image onto different colors of Bazzill card stock and then added the ribbon (which already had the leaves on it). Some of you on my last post was complimenting me on stamping the bones onto the ribbon. I went back to read what I wrote, but I'm not sure where some of you got that. The ribbon I used already had the bones on it. So I wanted to clear that up. I did not stamp the bones on the ribbon. Anyway, below is a close up to show the glitter I applied to some of the leaves using my Gelly Roll silver glitter pen:


It still didn't show up very well in the photo, but it gives you an idea. I did not give this one a sentiment because there wasn't much room for one, and I just wanted the image to have the stage. The sentiment can go on the inside. I'm loving to color! This was a blast!

OK, as I stated above, I was tagged by the ever beautiful, ever talented Laura Davis. So I guess I have to give 7 things about me that you all probably don't know. So, here goes:

1. I used to be a dance instructor in the 70's for Arthur Murray. My official title was "Disco Specialist". LOL Besides all of the popular disco dances, I was also a Cha Cha pro. I can still do a mean Cha Cha!

2. I can't kill anything! If I find a spider in the house (they make my skin crawl!) I go to great lengths to catch them and release them unharmed outside. If it is too cold out, I let them go in the garage (it is heated) LOL. When I'm cutting the grass, if I see a bug in the path of the lawn mower, I will stop and get it out of harms way.

3. I lost a brother to AIDS several years ago.

4. My favorite meat is BACON! I could eat bacon on anything! LOL

5. About 15 years ago, I owned my own business called "The Basket Maker". It was a gift basket company and we had a small shop on a trendy street in a place called Broadripple. My favorite product we offered was called the "Kiss My Assket" which was a basket full of nasty stuff (i.e. dead roses, plastic vomit, etc.) that people would send to people they had an issue with. Too funny.

6. I LOVE to gamble, and have been to Vegas 12 times. My favorite is video poker, and when I am in Vegas, I can sit at the same machine for 8 hours straight. I have a bladder the size of Texas! LOL

7. I have played the Hoosier Lottery and the Powerball Lottery since they began and have played the same set of numbers every week, twice a week for all those years. Boy do I have plans for when I win! For one thing, I promise all of my faithful commenters here that I won't forget you! I was thinking that if I ever would win millions, I'd fly you all somewhere fabulous for a getaway weekend of crafting at an exotic resort. That way, I could meet you all in person and we could have a blast! So, there is an incentive for you to comment more often! LOL

So, there you have it, 7 things that you probably didn't know about me.

Finally, I received an update on Glee (my blogging friend who is seriously ill) and the word is not much different. As of the 23RD, she was still on a respirator and I checked her blog today to see if her husband had updated and he had not. So, thanks so much to all of you who went and left such great messages on Glee's blog. I know her husband appreciates the outpouring of support for them. Please keep them in your thoughts and prayers.

Well, that is it for this one! I'll be posting again on Thanksgiving. I thought I would post a Thanksgiving card and list some of the things that I am grateful for. So, hope you come back to visit. Until then, thanks so much for visiting, I appreciate it so much. Don't forget the pic of the week below! I'll see you on your blogs!


Best,

Curt O'Brien

"God help me be the person my dogs think I am."

Sunday, November 23, 2008

WE HAVE A WINNER AND A NEW CARD TO SHARE

Hey All! Hope you have had a wonderful weekend, and for those of you who haven't been feeling well (there are several of you!) I hope you are much better! Well, we have a winner of my blog candy. But like all of my other contests, I've put the winner's information at the end of the blog. I've also got a new card to share with you. So no peeking until the end! Let the excitement last just a bit longer. . . LOL Here is my card if you haven't already whizzed by it to see if you're the winner!

I am so in love with the House Mouse stamps! Thanks to Juliann at Pixieshire Too, I happened to stumble onto such a deal. She had made this adorable Christmas card with a House Mouse stamp on her blog, and I just loved it! She was so kind and sent me a Hobby Lobby 40% off coupon to use. Well I went rushing over to Hobby Lobby to buy the stamp and was happily surprised to find all of their Stampabilities stamps were 50% off! I didn't even need the coupon and got a better deal! But because she sent it to me I probably wouldn't have gone until later in the week and the sale would have been over. So, I ended up buying 3 different House Mouse stamps. Thanks Juliann! So this card I made with one of them. . .


I made this for our next door neighbor who was kind enough to make Jay and I a homemade Pumpkin Nut Roll. It was wonderful. I made a second one of these cards that is identical accept I switched the color of the critters. The rabbit is brown and the mouse is grey. I made that one for another sweet neighbor across the street who gave us the most wonderful homemade beef stew. So on the front of the cards it says "Thanks" and on the inside it says "That Was Yummy!". I thought this stamp was so perfect for that. I stamped the image in black Archival ink, colored the image with colored pencils and blended them with OMS. I mounted the image on Bazzill card stock, and then mounted that on printed paper (I don't know who makes it). Added the little dew drops from Impress Rubber Stamps, and raised the sentiment (computer generated) with foam squares. Added the satin orange ribbon and done!

OK, now to the winner. . . shall we have a drum roll please . . . .(Large and deep announcer voice here) and the winner of Curt's fabulous 10,000 hit celebration blog candy is. . . . . . . . . Joan Fricker!!!!! Joan wrote: "Curt, Congratulations on your 10,000 visits. Isn't this fun?? Great cards today and I love all your little details. Your gift is extremely generous and will be great for the lucky winner. Great job as usual! Joan" Congratulations Joan, YOU are the lucky winner! Please email me with your home address and I will get your gifts out to you right away! Below I published just the top 12 so you can see if you even made it into the top 12:

1. Joan Fricker
2. Sue
3. Marie
4. Scossie Jane
5. Sena
6. Catherine
7. Julie Koerber
8. Sue
9. DPKennedy
10. Deb Neerman
11. Ila
12. Jamie Martin

It was weird, I put my "regular commenters" in twice as stated in the "rules", but not one of them had their name show up in the top 12 twice. For example, Julie Koerber was entered twice, and she came out #7 and #49Th on the list. I just think that Random.Org is so cool.

Anyway kids, that's it for this post. Again, congrats to you Joan and I hope you enjoy your goodies!

Don't forget the pic of the week below. The color of these leaves with the berries was so unusual, they really made an odd color combo. Also, I'm going to be posting a lot more frequently in the next few weeks! I'm in a card making mode, and I have several lined up ready to share! Hope you come back to see them.

Thanks so much for visiting my blog and I'll be seeing you on yours!

Best,

Curt O'Brien

"God help me be the person that my dogs think I am."

Wednesday, November 19, 2008

BLOG CANDY & NEW CARDS!!!

Hey All! Well, as promised in my last post, I am celebrating my 10,000 blog hits (way over now)! I put together something a little different than the usual blog candy. This prize is more for enjoying while one stamps instead of using it to stamp. Intriguing? OK, first you have to look at my cards! LOL That's surely what you came here to do, right? The blog candy thing was only secondary, right? Hmmmmmmm? LOL So here are my new cards. . .


This one is for my old director where I used to work. She is leaving the company, and I wanted to give her a card to wish her luck on her new job. Here it is. . .


I love this new stamp that I just got form Impress Rubber Stamps. They have so many cool things, and their prices are very reasonable. The stamp is by Memory Box. It is a wooden stamp, and the main stamp is where you would think it should be, but the secondary stamp the little thing that floats away is stuck to the side of the stamp, so they are both actually one stamp. Very cool. I stamped this with Staz-on Timber Brown ink on cs by Scrapworks called Light Coffee. The black is Bazzill cs. Here is what is amazing to me. I stamped the main image in Versamark embossing ink on the cs as a background image and just heated it with my heat gun to get this effect. Usually embossing clear ink gives a much lighter "watermark" effect, but for some reason it looks like a brown ink! I loved how it turned out. I also stamped the little floaty thingy multiple times on the strip for a background. I used my glitter Gelly Roll pen to put the silver glimmer on each. I then used my round and scalloped Nesties to cut one of the floating thingys out as well as the dandelion and adhered them with foam dimensionals. The tag thing with the sentiment (which was computer generated) is from a stamp set that I have no idea who made. I stamped it on the same card stock, cut it out, used my slot tool, then added black grosgrain ribbon. Here is another shot:


I also made her a second card. When she sent me the email that told me she had gotten another job, she also informed me that she got a new puppy and attached a picture. The picture was not very good (the pup's eyes were all glowing yellow orbs, and it was a little fuzzy) so I doctored it up in Photoshop and printed it out.


I used one of those photo cards that you buy in packs to insert the picture, then embellished it to make it more "puppy appropriate". I added ribbon and stamped the bones and paw prints on the card. Is this puppy adorable or what? It is a Cavapoo and her name is Sam.

OK now for the blog candy prize. I wanted something really grand for my 10,000 hits prize so to start it off, this card goes to the winner along with the prize. The card actually sets what the theme of the prize is. Here is the card you will get with the prize. . .


The main image and sentiment is from the Flourishes set called "Coffee With Friends". I wanted to get a wintry feel for the card, so I stamped the coffee cup image directly onto the snowflake paper. It is by K & Company. I cut the coffee cup out using a combination of scissors and an Exacto knife (for the handle). I mounted it with foam dimentionals on plain white cs that I sponged with Colorbox Aqua Blue ink. I used my silver sparkle Gelly Roll pen to get the shimmery effect on the steam. I then mounted that onto more K & Company paper which is the other side of the snowflake paper. I then mounted that onto black cs and shimmery blue cs by the Paper Company. Did the same thing for the sentiment, mounted it on dimentionals, added the bling at the bottom, and done. It is yours along with this prize. . .


I put together what I think is a really nice wintry "pamper me" gift box full of stuff. Here is another shot of everything out of the box:


Here is the list of items:

1 package of Southern Comfort flavored coffee
1 package of Ghiradelli Chocolate Caramel coffee
1 package of Land O Lakes Cocoa Classics Caramel Chocolate flavor hot cocoa
1 package of Land O Lakes Cocoa Classics Hazelnut Chocolate flavor hot cocoa
1 Gingerbread Man candy tin filled with Hershey's Holiday Hugs candy
1 scented candle in a frosted glass jar with top in a shimmery drawstring bag
1 two-pack of holiday self stick note pads
1 holiday magnetic list note pad
1 long spiral bound holiday note pad with polar bear picture on front
1 tin of Starbucks After Coffee chewing gum cinnamon flavor
1 tin of Starbucks After Coffee mints vanilla flavor
1 tin of Starbucks After Coffee mints spearmint flavor
1 ceramic snowman coffee mug with ceramic lid
1 gorgeous snowman motif holiday gift box

How about that???? No stamping stuff, just stuff to enjoy while you are stamping! Picture it now . . . sitting at your crafting table, a scented candle burning, the smell of caramel hot cocoa wafting up from your adorable snowman mug. As you watch the snow falling softly just outside your window, you unwrap a chocolate hug. . .LOL I should write commercials!

Anyway, to win this gift box full of goodies, you need to leave a comment here on this post and you will get one entry. If you are one of my regular comment posters (those of you who consistently visit me, post after post and leave such wonderful comments) you will automatically get a second entry as a thank you for being such a loyal commenter. You will have until Sunday, November 23rd at 6:00 PM EST to leave your comment in order to be entered. I will put every one's name on a list (my loyal posters twice) and will run it on Random.Org. The person who comes out #1 on the list will be the winner. Good luck everyone!

On a final sad note, my blogging buddy Glee at Gleefully Done, is very ill. Her husband posted for her and has let us know she is on a respirator in the hospital. She has pneumonia. She was just healing from a recent eye surgery, and now this. Please if you would go visit her blog and leave her a comment of best wishes. Her husband has said he will make sure that if you leave a comment on her blog he will make sure to get it to her in the hospital. At the very least, please keep her and him in your thoughts and prayers. She is a very sweet lady who needs our support right now!

Thanks again for reading this very long post (but hey, what's new huh?). Also don't forget to take a look at the pic of the week below. I'll see you on your blogs!

Best,

Curt O'Brien

"God help me be the person my dogs think I am."

Saturday, November 15, 2008

HERE IS YOUR TUTORIAL!

Hey All! OK, I'm wiping the sweat from my brow on this one. For those of you who do tutorials on a regular basis (Mel that means you! LOL) I tip my hat to you! Good Lord this was some work! Trying to hold things and take a picture with the other hand was a real endeavor and then to write everything down each step and make sure I didn't forget anything was tough, but I think I've got it all. So, here is the tutorial you've asked for. . .


SURPRISE DIORAMA CARD


1. Cut two panels of card stock so that you have two at 4 5/16 x 11.


2. Score panel one at 4 1/2, 5 1/2, and 10 inches.

3. Score panel two at 15/16, 5 7/16, and 6 1/2 inches.


4. Using whatever DP you are going to use for the back of the diorama, cut a panel that is 4 1/2 x 4 5/16 inches.


5. Stamp background image on this panel (make sure you stamp it correctly depending on the orientation of the card. It will either open from the top or the side. This will make sense when you start to fold). Set image aside for now.


6. Working with panel 1, cut a window between the 5 1/2 inch and 10 inch score lines. I used the largest scalloped rectangle Nestie. You obviously can use whatever shape you want.


7. After cutting the window out, I then ran this section of the card through the Cuttlebug again using the Swiss Dots embossing folder.


Panel 1 should now look like this:

8. Using a strong 2 sided tape, tape panel 1 at far left edge and also at the edge of the first score line like this:


9. Line up right edge of panel 2 with first score line on panel 1. Secure it with the tape you just put down. You should now have one long panel like this:
Here is a shot of it with a little bend at all the score lines so you can see them better.


10. Now comes the time to adhere your background image that you stamped earlier. Adhere it here (look at the photo below). It shouldn't be too hard to figure out where to place the image, because at this point there is only one place it can go. Remember, you need to make sure you attach it in the correct orientation (see #5.).


It should now look like this:
11. Stamp middle "3-D" image on a separate piece of card stock.


I used Marvy's Liquid Applique on the branches to give it a 3-D snowy look. Then heated the liquid applique with my heat gun. While it was still "warm", I sprinkled the tree with glitter and then pressed it in with finger so that it would adhere to the applique. It works really well.


12. Cut image out and set aside for now. NOTE: Be sure to leave at least a 3/4 inch bottom on the image to be able to fold it under (see next step).


13. At this point, I would start folding at the score lines so that you can "see" your card as it is going to be once folded and to locate where your front cover of the card is.


14. Decorate the front of the card however you decide. I cut an identical panel and stamped an identical image of the one I used for the background on the inside of this card. I matted it and used a decorative corner punch and matted it on the front of mine.

15. Now, flip back over and add 2-sided tape here to finish off window box.


16. Tape the front of the 3/4 inch tab of your cut out image with 2-sided tape and fold it back so that it stands up on its own (tape is underneath).
17. Slide cut out image behind window and press down firmly to adhere.
18. Now decorate the panel in front of the window with DP and sentiment.
19. OK, so you are now done. . .sort of. Look at the picture below and note the "flap":
As you fold the card closed, you will notice that this little flap will fold nicely over the outside edge of your card. I left this as an option. I was thinking that you could use this as a closing feature by adding a button with string, a slip in tab, etc. However, I chose to cut this flap off completely. So that it just becomes the front of the card that you simply lift open. Here is the final series of pictures of the final product from pulling out of the envelope to the open product:


There you have it! I hope this wasn't too confusing. I know I probably added way too much detail and way too many pictures, but I wanted to be sure that it was clear. Please don't think that after all this that it seems like to much or too time consuming. It really isn't that hard and only took me less than 30 minutes to do this one. If you have any questions about this tutorial, please do not hesitate to drop me an email.
I hope some of you make one of these. I would love to see what you come up with. I'm sure that some of you could find an easier way of getting the same results, and if so, I would love to hear about it. If you do make one, please leave a comment on this post with a link so that I and everyone who visits can take a look.
Hope you enjoyed it! I'm fast approaching my 10,000 hits, and I have something special planned to give away to celebrate. So stay tuned. Thanks again for visiting! I'll see you on your blogs! Don't forget the pic of the week below. . .
Best,
Curt O'Brien
"God help me be the person my dogs think I am."