Today's post highlights my very first Christmas project. How do you like the updated look of the blog and the new pics of the boys? LOL Aren't they adorable in those Santa hats? They are so good at posing for me and they tolerate so much with their Daddy's constant search for great photos of them! I so love them!
I have been working on this project for the last several days trying to perfect it. I plan on selling these next year at a huge holiday sale they have in this area every year at the end of October. This project has a lot going on, so it's going to take me from now until next October to complete enough to sell! LOL Here it is:
And here is what's inside:
This is not totally my design. I got the idea complete with a great tutorial HERE: This is such a great stationery box and is so versatile for so many occasions. The great thing about it is that it makes such a nice gift. This set includes the following:
- 4 note cards with envelopes
- 4 embossed holiday gift tags
- 4 embossed holiday gift enclosure cards with envelopes
- 4 postage stamps
- 1 note pad
- 1 pen
It is such a surprise when it falls open when you lift the lid. Here are some shots of the individual items:
The note pad cover is one of the things I added to the original design. I used the same card stock (which was already embossed with the pattern) to make the cover. I simply cut a piece that was a 1/4" wider than the pad. I then cut out the decorative end with my Nesties. I attached a ribbon around it, then attached it to the box with red line tape. So you just untie the ribbon and only the pad comes out. I also made simple loops with the same card stock and attached them with red line tape to form the pen holder. The other thing I added was a stamp holder on the side. I've decided in working with this, that I'm going to move the stamp holder to the box section right above the pad to hide the "intersection" of the two holders. I think this will be better because where it is now, it causes a slight bulge on the one side of the box when it is closed. Here is the stamp holder up close:
You can see above that the stamps are in a little pouch that is kept close with thin craft magnets.
Here are the tags:
The reindeer is embossed with gold detail ep and then I added a glittery dot for the "Rudolph" look to give them a little whimsy. I used a red eyelet at the top and then ran gold cord for tying. The stamp is by Stampendous.
These are the gift enclosure cards. I again embossed the image in gold detail ep then added glittery dots for the ornaments. The stamp is by Northwoods. Each card has an envelope.
Here are the individual note cards:
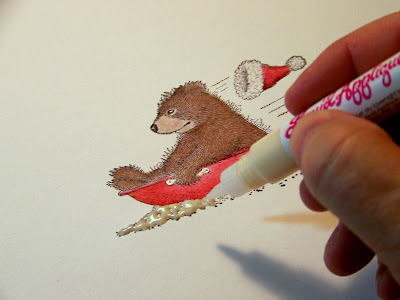
I used liquid appliqué on their hats and glitter on the snow. Here is a close up:
Next note card:
And a close up:
I used glitter dots on the patterned paper to bring out the berries, and glitter on the edge of the snow on the branches.
The next card:
I used some fuzzy yarn for the side of the card as an embellishment. Now, the final card:
The photo makes it look like the image panel is not centered, but it really is. It is just the angle and the shadowing because of the center matted image being popped up with foam squares.
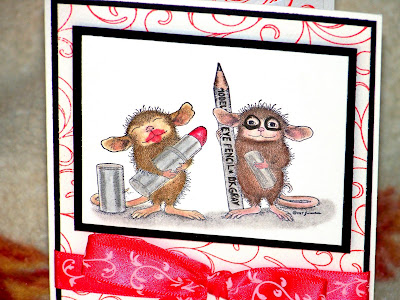
All of the cards were colored with my colored pencils and oms, and of course all of the images are from Stampabilities House Mouse series. I have ordered several different images so that I will have a variety of images to use for these Christmas note card sets. But I'm sure you can see, that this box project would be great for "every day" note cards, Halloween, Easter, Autumn, etc. The box really isn't difficult to make, and I'm sure with a little more practice I will be able to knock these out a lot faster. Here is a final picture of the whole set with everything shown:
So, do you think they will sell at a craft bizarre? I sure hope so!
I also wanted to share with you a very special gift I received from my blogging friend Chris at Mudmaven Designs. She had emailed me for my address and said she had something to send me. Well this is part of what was in the package:
I was so surprised and excited. I couldn't believe how kind and thoughtful! She also included in the package a beautiful card, and Jumbones for my boys! Chris, thanks again so much for your kindness and generous gift. It is so appreciated!
Well, that's it. I hope you liked what I shared and I hope that you try one of these! I would love to know if you make one because I would love to see yours! So let me know if you do! I'll be doing my Wednesday Evening Post this coming Wednesday and will be announcing the winner of the HM stamp from the previous post. Good luck to all of you!
Again, thanks for stopping by and caring enough to take the time to comment. They mean so much to me. Don't forget the pic of the week below!
I'll be seeing you on your blogs!
Best,
Curt
"God, please help me be the person that my dogs think I am."


