Hey All! I'm writing tonight's post with a very happy heart! I made the HM DT!!!!!!! I just can't believe it! I have been pinching myself all day making sure I'm not dreaming! I'm so excited about it. It was published late this morning on the House Mouse Monday Challenge Blog. I have wanted this for months and months and it is finally here! So, that means that there will still be a Monday post and a Wednesday post just like before! Can't wait to get started with them! Thanks all for your encouragement and your good luck wishes and all the fingers crossed. I just know that helped a bunch! You are all the sweetest!
OK now that I got that exciting news to you, let me get some of the other projects out to you:
My first project is way outside the realm of what you are used to seeing from me. It is also something that has been over 2 years in the making. . .that is in my head. LOL I've just now got around to getting it out of my head and making the project a reality. Some will probably think it is silly, but it was one of those things that if I didn't get it made, it would remain in my head banging around up there until it got out. Here it is and I'll explain it after the picture:
LOL! What do you think? I know, some of you are going "What the . . . .?" LOL Let me explain what this is. Every time I would take the boys out and walk them in the woods we would walk through this area where the ground was covered with walnuts. When I would see the ones that had already been cracked in half, they always reminded me of owl faces. So for the longest time, I would think to myself how they looked like owl faces and how cute it would be to make a "scene" with one. I have thought of doing that now for over 2 years! Now it's done. Here are a couple of close ups:
I glued the half walnut onto a full walnut which makes the body. I made the "tree" from a dead branch. I got one of those round wood bases from Michael's and drilled a hole in the center then used hot glue to secure the small branch in the base. I then used floral moss to cover the base and attached it with hot glue. I attached the "owl" to the branch with hot glue as well as the leaves which I got from Michaels. Really easy project, and it looks really looks cute on the entry table in our entry hall. I know it's not card related but it is crafty and I wanted to share with you all. I also have several third degree burns from using that dang hot glue gun! LOL Hate those things!
Now on to my cards. Halloween is right on top of us now and I'm hurrying to finish up on my Halloween projects for this weekend's chili super that I host here at the house with a few good friends and the "Moms". Here is a sampling of the cards that I'm giving to each with their Halloween goodies I'm making for them:
Do you think I like HM and should be on the team???? LOL I just went nuts in obtaining these cute Halloween images and thought they would be perfect for this weekend's cards with the gifts.
I also had a very nice surprise a couple of weeks ago. I got an email from the Official House Mouse Designs website (where you can purchase these stamps direct) that someone had sent me a gift certificate! OMGosh! I was so taken aback by it. It was sent by my very sweet blogging friend Elaine Moore. She thought I would enjoy the Halloween stamp below so she thought she would send a gift certificate for me to purchase it or any other stamp I would like. Elaine, thanks so much for your kindness and generosity! I was overwhelmed! Hopefully she has gotten this card before she sees it here! LOL
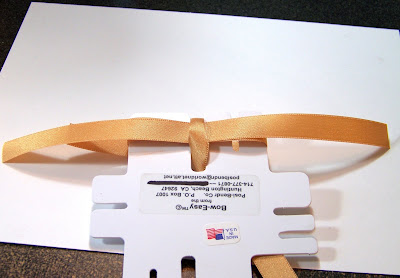
Yes, I did make a smaller card with this image (in the group above this) but this is one of my 5 X 7s. I colored it of course with my ccp/oms added the brads and ribbon tied with my Box Easy. The inside is decorated very much like the outside. You can see below that I added glitter to parts of the image with a glitter pen:
This is such an adorable image! Thanks Elaine for thinking of me! This comes in handy now that I'm on the DT! I need all of the HM stamps I can get! LOL Again, thanks for your kindness. It meant so much!
My last project is the one I mentioned in an earlier post about the note cards I did for a good friend of mine who is going to Las Vegas with 16 of her girlfriends to celebrate her 50th birthday! She is making up gift baskets for all of those who are going, so I thought it would be neat to have these note cards in the baskets with her personal note to each guest.
I did the flamingo because they are going to stay at the Flamingo in Vegas. This is a Mrs. Grossman sticker. I stuck it to white card stock then punched it out with my Nesties. I added the really sparkley scallop also made with my Nesties. It really gleams, take a look:
The paper is from one of those glitter DCWV stacks. The background paper is from The Paper Studio. Once I got the rhythm going, the project went fairly smoothly. Took me about 3 hours to do all of them. Here they are as a group (sorry for the bad picture, lighting was horrible):
OK, that's it! Another gargantuan post. Next Wednesday's post is going to be full too. Another sweet blogging friend sent me my choice of any of her stamp sets (and boy that was a tough decision because she has a ton of GORGEOUS stamps). I'm making something from them, and it will be given away. So make sure you come back next Wednesday to see! Also, don't forget the pic of the week below!
Thanks again so much for all of your great comments and well wishes. I love you guys!
Best,
Curt O'Brien
"God, please help me be the person that my dogs think I am."


